This guy got lost in my to-do pile for a bit... we had company at the end of June/beginning of July, and in the clean-up process, I lost my copy of the pattern that I had put all my edits and corrections on... I just found them this week!

May Monster
I used worsted weight yarn and an F hook (3.75 mm). Each
monster takes 1.6 oz worsted weight in main color and less than half an ounce
of your accent color and white for the tentacle bobbles.
Make arms and ears before the body, so you can crochet them
on. I also like to crochet the eyes and mouth before making the body (if you’re
doing that version), so I can sew those on while I can work from both sides.
Arms: Make 2 in main color with white bobbles. Note:
arms are not stuffed.
R1: sc 6 in MR (6)
R2: (sc, inc) x 3 (9)
R3: sc (9)
R4: sc, change to white, 4dc bobble, change to main color,
sc 7 (9)
![]() When you sc over your
bobble stitch in round 5, use the BLO of the bobble. This gives a cleaner look
to your bobble.
When you sc over your
bobble stitch in round 5, use the BLO of the bobble. This gives a cleaner look
to your bobble.
R5-7: sc (9)
R8: repeat row 4
R9-11: sc (9)
R12: repeat row 4
R13: sc (9)

Fold in half (if needed, do another sc or two so that your
bobbles are centered) and sc closed. FO and weave in end.
Ears: Make 2 in main color. Ears are not stuffed.
R1: 6 sc in MR (6)
R2: inc x 6 (12)
R3-10: sc (12)
R11: (sc 2, dec) x 3 (9)
R12: (sc, dec) x 3 (6)
Fold and sc closed. Weave in end.
Eyes: Make 3 in white
Round 1: 8 sc in MR. FO, leaving tail to sew to body. Don’t
tighten MR completely, as you will be putting a safety eye through the center. I
used 10 mm safety eyes.
Mouth: Make 1 in white
Ch 8.
Starting in second chain from hook, sl st, sc, hdc, dc, hdc,
sc, sl st. FO, leaving tail to sew to
body. Using embroidery floss or sport weight yarn, embroider 3 vertical slashes.
Sew centered under the eyes with the top of the mouth (the chain) at row 13.
Legs: Make 2
in main color. You will finish off leg one, but after leg two, you continue on
with the body.
R1: 6 sc in MR (6)
R2: inc x 6 (12)
R3: (sc, inc) x 6 (18)
R4-8: sc (18)
Body:
Chain 3 and join leg 1 with a sc. Continue to sc around leg
1 and make 3 sc in the connecting chain. Sc around leg 2 and make 3 sc in the
back side of the chain. (42)
R2-12: sc (42)
R13: sc, attaching arms at sides
To determine arm placement, fold body in half and mark side
stitches. When you get to the stitch before the marker, hold arm in front of
your work and sc through both the arm and the body for the next three stitches.
Repeat for other arm.
R14-21: sc (42) Stuff legs, stuff body as you go.
Two of the eyes will be sewn with the center over row 16/17.
The third eye will be centered between the other two eyes, over rows 19-20. The
mouth is centered between the lower eyes
R22: (sc 5, dec) x 6 (36)
R23: (sc 4, dec) x 6 (30)
R24: sc , attaching ears
to sides. (30)
R25 (sc 3, dec) x 6. (24)
R26: (sc 2, dec) x 6. (18) Finish stuffing
R27: (sc, dec) x 6. (12)
R28: dec x 6 (6) FO
Cut 10 7” strands of hair. Latch, two at a time, evenly
spaced across the top of the head.
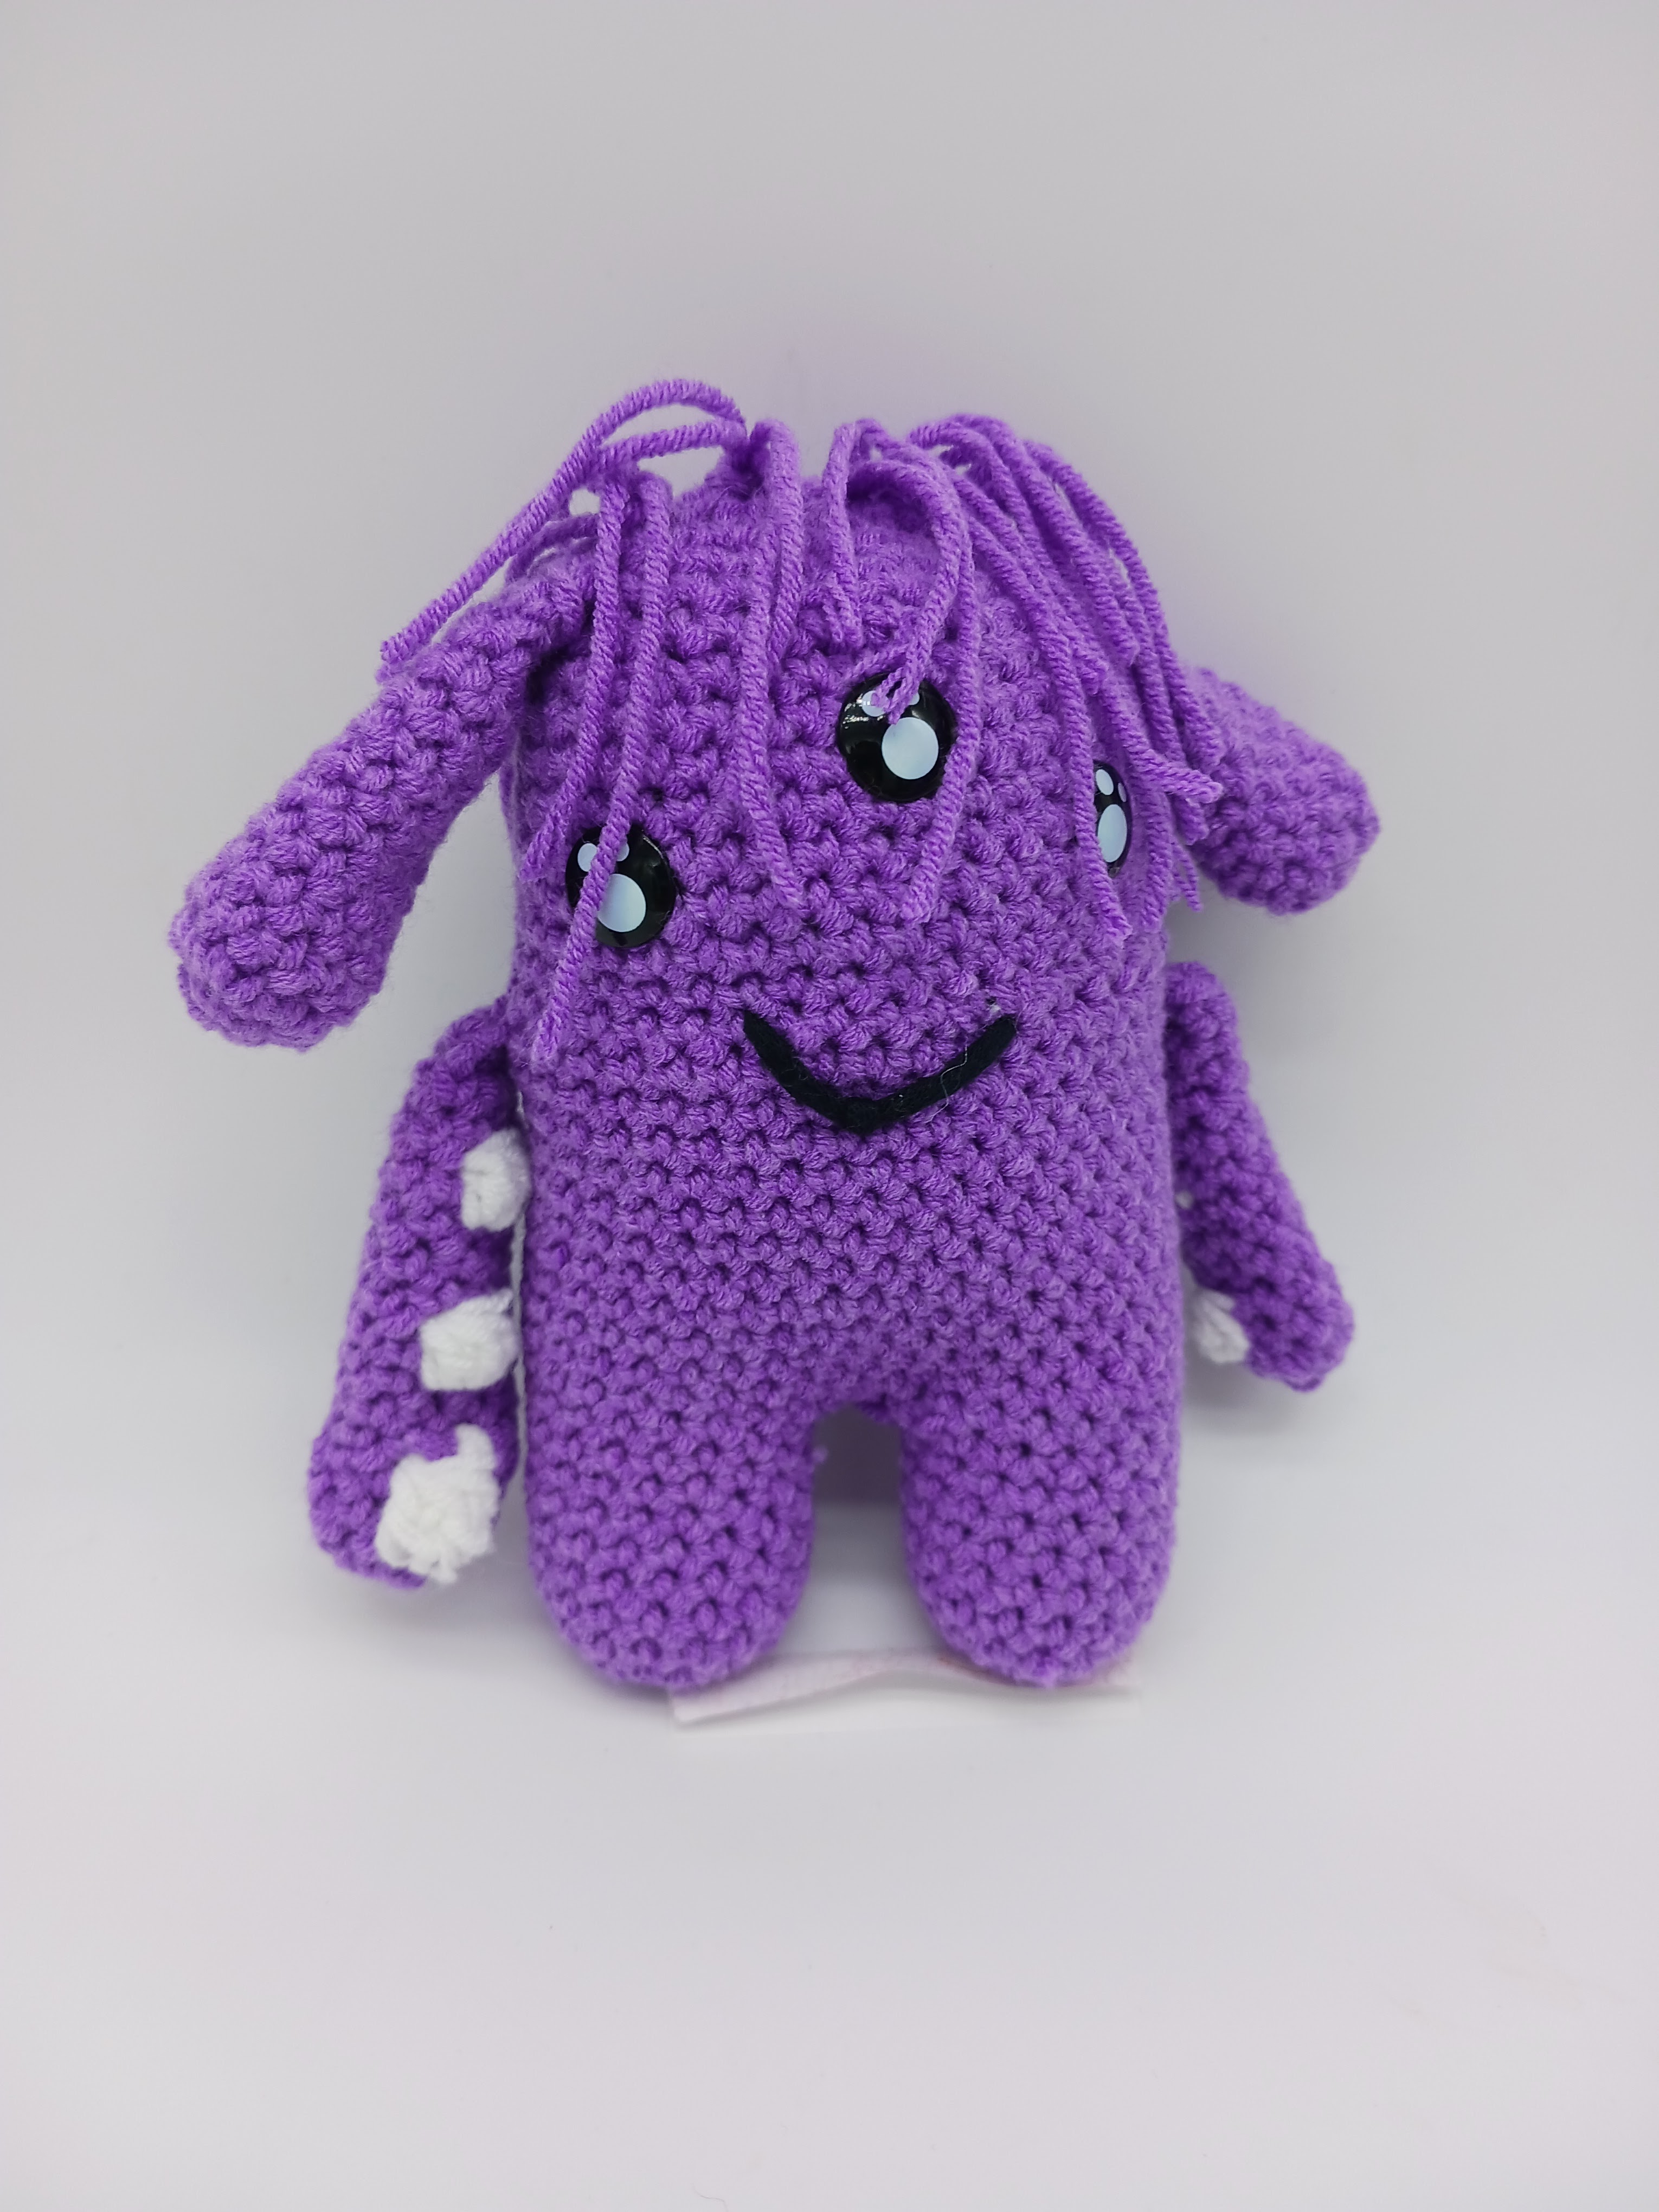
For my purple monster, I used Kawaii safety eyes rather than
making the white backgrounds, and embroidered a simple smile, making it a
no-sew version.

No comments:
Post a Comment