Showing posts with label monster of the month. Show all posts

Friday, January 3, 2025

December Monster of the Month


December Monster of the Month


This monster comes to you courtesy of my four-year-old granddaughter Lyra, who drew me a picture of a monster back in November. Since it was just before Thanksgiving, she drew me a “Pumpkin Monster”.

When we were at her house for Christmas, I started work on designing the monster.

When I said I needed to make the nose, she said she wanted me to use gold pony beads for the nose.

I tried putting them on the snout, but they looked more like eyes than nostrils, I added a smile at the bottom, and version 1.0 ended up with a turtle-type face.


I used a worsted weight yarn and size F (3.75 mm) hook.

I used less than an ounce of each color.

The body is worked as a rectangle shape, then sewn together at the short end and gathered at the long ends.

Start with chain 21 with color 1. Starting with the second chain from the hook:

Row 1 (and every row): sl st 4, sc 4, hdc 4, sc 4, sl st 4, ch 1, turn. (20)

Keep your slip stitches loose, so you can work in them more easily. Short version of the pattern: work 4 rows of each color until you have four wedges of each color. Change color with your turning chain.

Row 2-4: Color 1

Row 5-8: Color 2

Row 9-12: Color 1

Rows 13-16: Color 2

Rows 17-20: Color 1

Rows 21-24: Color 2

Rows 25-28: Color 1. At the end of row 28, finish off color 1, leaving a long tail to gather that end.

Rows 29-32: Color 2. Finish off, leaving a long tail to sew seam and gather other end.

Snout: (I used one of my colors for the snout and the other for the stem – but it’s your monster… you can do whatever you’d like!) I have included two options for row 3, to make a plain snout, or to make the pony bead version.

R1: 5 sc in MR (5)

R2: inc x 5 (10)

R3: sc BLO (10)

R3 pony bead version: BLO sc 4, pull yarn through bead, sc 2, pull yarn through bead, sc 4

R4: sc (10)


Finish off, leaving a tail to sew to face. If you did the pony bead “eyes”, embroider a smile along the loops of round 3.

Fold in half with the right sides together and sew the curved ends together. Use yarn end to gather the ends of your slip stitch rows together. Turn right side out. Sew snout over the hdc stitches on the center front of the monster. If you did the plain snout, add safety eyes 2 stitches over the snout, with 2-3 stitches between. Embroider nostrils on snout.

Stuff well and use the other yarn end to gather up the slip stitch edges. Weave in your yarn end.

Stem: with color of your choice

R1: 4 sc in MR (4)

R2: inc x 4 (8)

R3: BLO sc (8)

R4-5: sc (8)

Finish off, leaving a tail to sew to top of monster, over the gathered stitches.


Thank you to Strawberry Bonnie for testing the pattern for me. She used worsted weight yarn and 10 mm safety eyes. 


Tuesday, December 3, 2024

November Monster of the Month


November Monster of the Month

Made with worsted weight yarn and a 3.75 mm (F) hook, measures 3.5”  tall sitting, 6” at full height.

Takes about .5 oz main body color and 8 assorted 16” lengths of scrap yarn, plus small amounts of pink and black for face embroidery. I used 10 mm safety eyes.


Foot/Leg (make 2 in body color)

R1: 6 sc in MR (6)

R2: inc x 6 (12)

R3: BLO sc (12)

R4: (sc 4, dec) x 2 (10)

R5: (sc 3, dec) x 2 (8)

R6: (sc 2, dec) x 2 (6)

Lightly stuff foot, then fold top together and sc across (2). This is Row 1 of leg.

R2-6: ch 1, turn, sc (2)           

FO. Legs will be crocheted in, so you do not need to leave a long tail for sewing. I leave about 3” so I can tie the two yarn tails together inside the body.

Variation: for longer legs, do more repeats of row 2.

 Body:


R1: 6 sc in MR (6)

R2: inc x 6 (12)

R3: (sc, inc) x 6 (18)

R4: (sc 2, inc) x 6 (24)

Now we will add the legs. Hold the leg in front of your work and work through both the leg and the body as indicated.

R5: sc 8, sc 2 with leg, sc 4, sc 2 with leg, sc 8 (24)

R6: sc (24)

Now we add the arms. To make an arm, ch 9, sl st in 2nd, 3rd and 4th ch from hook (finger made),  (ch 4, sl st in 2nd, 3rd and 4th ch from hook) x 2, sl st in original chain back to beginning.


Variations: for longer arms, make a longer starting chain. For more fingers, repeat the (ch 4, sl st in 2nd, 3rd and 4th ch from hook).

R7: sc 6, Arm, sc 12, Arm, sc 6 (24)

R8-10: sc (24)

R11: (sc 2, dec) x 6 (18) Stuff body.

R12: sc (18)

Place eyes between rounds 10 & 11, with 4 stitches between. Embroider a nose between the eyes, one row lower, and a mouth two rows below nose.

R12: (sc, dec) x 6 (12) Add more stuffing if needed.

R13: dec x 6 (6)

FO, leaving a long tail to close hole.


Hair: Take one of your 16” strands of scrap yarn. Pull up a loop at the top of the head. Ch 8. FO and trim ends if needed.

If you continue to use your F hook, the “braids” will be stiff and stand up straight. If you prefer a more droopy braid, once you have pulled your yarn loop through, change to a larger hook (I changed to a K hook).

Variations:

·       Use longer strands of yarn for longer “braids”.

·       Use the horn from a previous monster to add horns to your monster. Monsters from February, March, April, June, August, and September have horns!


Thanks to Strawberry Bonnie for testing the pattern for me. Her monster turned out so cute! 


Monday, November 4, 2024

October Monster of the Month


October Monster

By Elaine Okupski of Penguin Place Crafts


Uses .6 oz worsted weight yarn in main color and a few yards in contrasting color, small amount of black for mouth and optional eyebrows

Size F (3.75mm) crochet hook

12 mm safety eyes


Sorry this is showing up a bit late, in November. I'm into craft show season, with craft shows every Saturday from October 26 through November 16, with three days of weekday shows mixed in! 

Since I've been so busy with shows, I made the October monster a smaller, simpler, quicker version. The only sewing needed is to add the spike strip to the head. 

Pattern: 

Start with legs, in main color.

R1: 6 sc in MR

R2: inc x 6 (12)

R3: *sc, inc* x 6 (18)

R4-6: sc (18)

Finish off first leg. After making the second leg, don’t cut yarn. Continue on to connect legs and start work on the body:

R7: sc 6 on first leg, inc x 6, sc x 6. Sc 6 on second leg, inc x 6, sc 6. (48)

R8-9: sc (48)

R10: *sc 10, dec* x 4 (44)

R11: sc (44)

R12: *sc 9, dec* x 4 (40)

R13: sc (40)

R14: sc 8, dec, sc 4, arm, dec, sc 4, dec, sc 4, arm, sc 4, dec, sc 8 (36)

(Arm: ch 15. Sl st 3, *ch 4, sl st 3* x 2, sl stitch back along chain)

Stuff legs, and continue to stuff body/head as you go.

R15: sc (36)

R16: *sc 4, dec* x 6 (30)

R17: sc (30)

R18: *sc 3, dec* x 6 (24)

R19: sc (24)

Eyes go between rounds 18 & 19, with 2 stitches showing between. Embroider a small smile under the eyes.

R20: *sc 2, dec* x 6 (18)

R21: sc (18) Finish stuffing.

R22: *sc, dec* x 6 (12)

R23: dec x 6 (6). FO, leaving tail to close up hole.


Spikes:

With contrasting color:

Ch 5. Starting in second chain from hook, sl st, sc, hdc, dc. *Ch 6, starting in second chain from hook, sl st, sc, hdc, dc* x 5. Sew spikes to sides of head. Finish off, leaving a tail to sew to monster. The chain between your 3rd and 4th spike will be over the final round of the head.

Thanks to Strawberry Bonnie for testing my pattern for me. She did embroidered eyes, and added some cute little cheeks!


Tuesday, September 17, 2024

September Monster of the Month


September Monster

The first two (in front) are made with chunky yarn and an H (5 mm) hook. The pink monster in the back is made with worsted weight yarn and an F (3.75mm) hook. It used .7 oz of worsted weight yarn, and a small amount of contrast color for the bottom of the feet and the horns.

Leg (start with contrast color)

R1: 6 sc in MR

R2: inc x 6 (12)

R3: *sc, inc* x 6 (18)

R4: *sc 2, inc* x 6 (24)

Change to body color

R5-8: sc (24). FO first leg, after second leg, continue on to body:

Body:

R1: continue with second leg. Ch 3, sc 24 around first leg, sc in each chain, sc around leg 2, sc in back loops of ch (54)

R2-5: sc (54)

R6-18 : decrease one stitch at each side. You should have 28 stitches now.

Insert eyes between rows 16 & 17, with four stitches showing between them. Embroider a small mouth between rows 15 & 16. For the pink monster, I used the yarn from embroidering the mouth to add some eyebrows, too! Stuff the feet well, and continue to stuff the body as you decrease.

R19: *sc 5, dec* x 4 (24)

R20: *sc 2, dec* x 6 (18)

R21: *sc, dec* x 6 (12) Add more stuffing if needed.

R22: dec x 6. FO and use tail to close opening, then weave in end.


Long ears:

Ch 20. Starting in 2nd chain from hook, sc 18, 8 dc in last chain, sc 18 in the back side of the chain. FO, leaving a tail to sew to head (or crochet in) at row 20.


Arms:

Chain 10. Starting in 2nd chain from hook, sc 8, 5 dc in last chain, sc 8 in the back side of the chain. FO, leaving a tail to sew to head (or crochet in) at row 16. I like to sew mine on, so I can sew them at an angle toward the belly.


Alternate arms (shown on pink monster):

Ch 15. Starting in 2nd ch from hook, sl st 4. (Ch 5, sl st 4) twice. Sl st back to the beginning of the chain. FO, leaving a tail to sew to the body.


Horns:

With white:

R1: sc 3 in MR

R2: inc, sc 2 (4)

R3: inc, sc 3 (5)

R4: inc, sc 4 (6)

R5: sc (6)

FO, leaving tail to sew to head. I sewed on either side of the magic ring, lined up with the eyes.


Thanks to my tester, Bonnie. She made her monster in worsted weight yarn, using 12 mm safety eyes and the alternate arms. 


Thursday, August 29, 2024

August Monster of the Month


August Monster

By Elaine Okupski of Penguin Place Crafts

Uses 1.4 oz worsted weight yarn in your main body color, with less than a yard of red needed for embroidering the mouth, and a few yards of white for the antenna.

Size F hook (3.75 mm)


I used 12 mm safety eyes. I think he would look cute with even bigger eyes. He measures about 6.5” tall (including antenna) when made with worsted weight yarn.

I made my legs first, so I could crochet them in as I went. I like putting the arms on at an angle, so I sewed them on. If you wanted your arms to stick out to the side, you could make them before the body and crochet them in, too.


Leg (make 2)

Round 1: 6 sc in MR (6)

Round 2-4: sc (6)

Round 5: dc 3, sc 3 (this helps to make the transition from foot to leg) (6)

Round 6-8: dc (6)

Round 9 is a short row to even out the row: hdc, sc, sl st. FO. Do not stuff legs. If you are crocheting them into the body, you stuff your yarn tail into the leg. If you prefer to sew the legs on, leave a long tail.


Head:

Round 1: 6 sc in MR (6)

Round 2: inc x 6 (12)

Round 3: *sc, inc* x 6 (18)

Round 4: *sc 2, inc* x 6 (24)

Round 5: *sc 3, inc* x 6 (30)

Round 6: *sc 4, inc* x 6 (36)

Round 7: *sc 5, inc* x 6 (42)

Rounds 8-13: sc (42)

Round 14: sc 19, (2dc bobble), (4 dc bobble), (2 dc bobble) (nose finished), sc 20 (42)

Eyes go between rows 11-12, centered over the nose. There are about 6 stitches between.

Rounds 15-16: sc (42)

Round 17: *sc 5, dec* x 6 (36) We’re decreasing for the neck. Stuff head, and stuff body as you go.

Round 18: *sc 4, dec* x 6 (30)


Embroider a smile below the nose.

Round 19: *sc 3, dec* x 6 (24)

Round 20: *sc 2, inc* x 8 (32)

Round 21: *sc 3, inc* x 8 (40)

Round 22: *sc 4, inc* x 8 (48)

Rounds 23-29: sc (48) If  you are crocheting your arms in, you can do so around rounds 23-25.

At this point, make sure your starting point is at the center back, so your tail is centered. You can fold your monster in half using the nose as the center front, and move your stitch marker if needed.

Make tail – ch 20, starting with 2nd chain from hook, sc inc, sc inc, hdc 7, dc 9, sl st to last stitch of round 29.


Secure  the legs with stitch markers to be crocheted on in Row 30. I put my blue monster’s legs under the eyes, about 8 stitches apart, but further apart with the brown monster. Placement is up to you! After all, it’s your monster! Continue on as usual with the rest of round 30. When I got to the stitch where a leg was placed, I removed the stitch markers and crocheted through both the leg and the body. Make sure the foot faces forward!

Round 30: *sc 4, dec* x 8 (40)

Round 31: *sc 3, dec* x 8 (32)

Round 32: *sc 2, dec* x 8 (24)

Round 33: *sc, dec* x 8 (16)

Round 34: dec x 8 (8) FO, leaving tail to close up round 34.

Arms: make 2 or 4, depending on how much yarn you have, and how crazy you want your monster to be.

Round 1: 8 sc in MR (8)

Rounds 2-7: sc (8)

FO, leaving a tail if you are sewing the arms on, or weave in the tail if you are crocheting the arms on. Arms are not stuffed.

Sew arms to body over rounds 23-25, angled toward the belly.


Antenna: make 2 with white yarn

Ch 6

Round 1: Starting in 2nd ch from hook, sc 4, 3 sc in last chain, sc 4 on back of chain. (11) Ch 3 and turn

Round 2: Sl st in first stitch. *ch 3, sl st in next stitch* x 10. (11 loops). FO, leaving tail to sew to head. Sew on sides of head over rows 6-7.


Thank you to Strawberry Bonnie for testing my monster! She used 14 mm eyes and I think they make her monster look adorable! 


Friday, August 16, 2024

July Monster of the Month


July Monster of the Month

By Elaine Okupski

Penguin Place Crafts

I made this guy with Lion Brand Homespun yarn and an H hook. He used 1.5 ounces of homespun, with a very small amount of red worsted weight needed to embroider his mouth (You could also use black or pink. I felt that red would show up best with this color Homespun). I used 12 mm safety eyes, but you could go bigger.


As you can see, my samples are very different. The guy in the middle is the original, which is presented below as "body one"... then I made the red guy... while watching Wheel of Fortune and Jeopardy, and with all the numbers being mentioned, I messed up my row counts and he ended up taller and skinnier. Putting the short, stubby legs on him made him look inappropriate, so I updated the legs and made them longer (so we have short stubby legs and longer legs in the pattern). And my tester Bonnie made another set of arms and added them for legs! 

For the guy on the right, I changed up the rows to make him chubbier, more of a pear shape. That is body 2! 

So you can mix and match the body and legs and get some very different looks from this pattern! 

You start at the bottom and work up, adding the arms as you go, then sew on the tail and legs and add the mohawk.

Body 1:

R1: 6 sc in MR (6)

R2: inc x 6 (12)

R3: *sc, inc* x 6 (18)

R4: *sc 2, inc* x 6 (24)

R5-7: sc (24)

R8: *sc 2, dec* x 6 (18)

R9-11: sc (18)

R12: *sc 4, dec* x 3 (15)

R13: sc (15)

R14: sc 4, (ch 20, starting in 2nd ch from hook, sc back – arm made), sc 7, make another arm, sc 4 (15)

R15-17: sc (15)

Place eyes (I used 12 mm) between rounds 16 & 17, with two stitches between. Sew a mouth 1-2 rows below the eyes, centered between them. Add stuffing to the head, and continue to stuff the body as you go.

R18: *sc 3, dec* x 3 (12)

R19: *sc 2, dec* x 3 (9)

R20: dec x 4, sc (5)

FO, leaving tail to close. Weave tail through FLO of the stitches of round 20 and pull closed. Weave in tail end.

Body 2:

R1: 6 sc in MR (6)

R2: inc x 6 (12)

R3: *sc, inc* x 6 (18)

R4: *sc 2, inc* x 6 (24)

R5: *sc 3, inc* x 6 (30)

R6-7: sc (30)

R8: *sc 3, dec* x 6 (24)

R9-10: sc (24)

R11: *sc 2, dec* x 6 (18)

R12: sc (18)

R13: *sc 4, dec* x 3 (15)

R14: sc (15)

R15: sc 4, (ch 20, starting in 2nd ch from hook, sc back – arm made), sc 7, make another arm, sc 4 (15)

R16-18: sc (15)

Place eyes (I used 12 mm) between rounds 16 & 17, with two stitches between. Sew a mouth 1-2 rows below the eyes, centered between them. Add stuffing to the head, and continue to stuff the body as you go.

R18: *sc 3, dec* x 3 (12)

R19: *sc 2, dec* x 3 (9)

R20: dec x 4, sc (5)

FO, leaving tail to close. Weave tail through FLO of the stitches of round 20 and pull closed. Weave in tail end.


Tail

R1: 6 sc in MR (6)

R2: sc (6)

R3: *sc, inc* x 3 (9)

R4: sc (9)

R5: *sc 2, inc* x 3 (12)

R6: sc (12)

R7: *sc 3, inc* x 3 (15)

R8: sc (15)

FO, leaving tail to sew to body.


Short Stubby Legs (make 2)

R1: 6 sc in MR (6)

R2: inc x 6 (12)

R3-4: sc (12)

FO, leaving tail to sew to body.

Longer, skinnier legs:

R1: 6 sc in MR (6)

R2: inc x 6 (12)

R3-4: sc (12)

R5: *sc 2, dec* x 3 (9)

R6-7: sc (9)

FO, leaving tail to sew to body.

Set your monster down on a flat surface and place the stuffed tail on the back so that the bottom of tail lays flat on the surface. Pin in place and sew. Set the monster back on the flat surface and pin the stuffed legs in place on the front of the body, so they are also laying flat on the surface. Sew them to the body. Mine had one stitch between them on the front of the monster for my original monster with stubby legs, but I put the long skinny legs about 6 stitches apart.

Cut 15-20 strands of yarn about 5” long. Loop the strands from the back of the head (at round 19) to the tip of the tail. Brush them out to give your monster a nice fuzzy mohawk. Trim as needed. 

I hope you enjoyed making your Monster of the Month!


Tester Photo from Strawberry Bonnie


Saturday, August 3, 2024

Monster of the Month: June

 I'm sorry for the delay in getting this guy published! Just as I finished up version 1.0, we found out that we were getting some out-of-town company. It was a mad dash to clean up, getting the dining room table (currently being used as a computer desk for my laptop) ready for family meals, and the craft room ready to accommodate guests. 

In the clean-up flurry, I lost my copy of the pattern with changes marked! Then I had two big craft shows in July, so I was more focused on preparing for those shows than looking for the pattern. 

So now, the shows are done, the pattern is found, and I present to you my June Monster! 

June Monster

By Elaine Okupski of Penguin Place Crafts

Made with worsted weight yarn and an F hook (3.75 mm), it measures 7” long and 4” high.

Uses 1 oz main color and small amounts of contrasting color for mouth, spikes and horns.


Starting at front with main color:

R1: sc 2, 5-dc Bobble, sc 2 in MR. (5) (Bobble is his nose. You can see with my yellow monster that I changed color for the bobble.)


R2: inc x 5. (10)

R3: *sc, inc* x 5. (15)

R4: *sc 2, inc* x 5. (20)

R5: *sc 3, inc* x 5. (25)

R6: sc 3, inc, *sc x 2, inc* x 6, sc 3. (32)

 You are leaving 6 stitches on the bottom without increases to keep the bottom flat, and keep him from rolling over.

R7: sc 4, (sc 3, inc) x 6, sc 4. (38)

Place safety eyes between rounds 4 & 5, with 6 stitches between. Embroider mouth below nose, between rounds 4 & 5.


Rounds 8-10: sc. (38) Stuff as you go.

Rounds 11-24: sc around, decreasing at the top center. This takes your stitch count down to 24.

Round 25: *sc 6, dec* x 3. (21) Stuff body well, and continue to stuff tail as you go.

Round 26: *sc 5, dec* x 3. (18)

Round 27: *sc 4, dec* x 3. (15)

Round 28: *sc 3, dec* x 3. (12)

Rounds 29-30: sc (12)

Round 31: *sc 2, dec* x 3 (9)

Round 32: *sc, dec* x 3. (6) FO, leaving tail to close hole. Weave tail through the FLO of round 32 and pull closed. Hide yarn tail inside tail.

Spikes: make one with contrasting color

*Chain 5. Starting in 2nd chain from hook, sl st, sc, hdc, dc.* Repeat until your spikes reach from the end of the tail to the center of head (around row 10). My monster had 10 spikes. FO, leaving a long tail to sew to back.


Horns (make two)

R 1: with contrasting color, 4 sc in MR. (4)

R2: with body color: *sc, inc* x 2. (6)

R3: with contrasting color: *2 sc, inc* x 2. (8)

R4: with body color: *3 sc, inc* x 2. (10)

R5: with contrasting color: *4 sc, inc* x 2. (12)

R6: with body color: *5 sc, inc* x 2. (14)

FO, leaving tail to sew to body.

Assembly: sew spikes to body, centering on the top of the body. Sew horns to head, over rounds 10-13. evenly spaced from the spikes.


Thanks to my tester Bonnie!


Tuesday, July 23, 2024

Monster of the Month: May

This guy got lost in my to-do pile for a bit... we had company at the end of June/beginning of July, and in the clean-up process, I lost my copy of the pattern that I had put all my edits and corrections on... I just found them this week! 

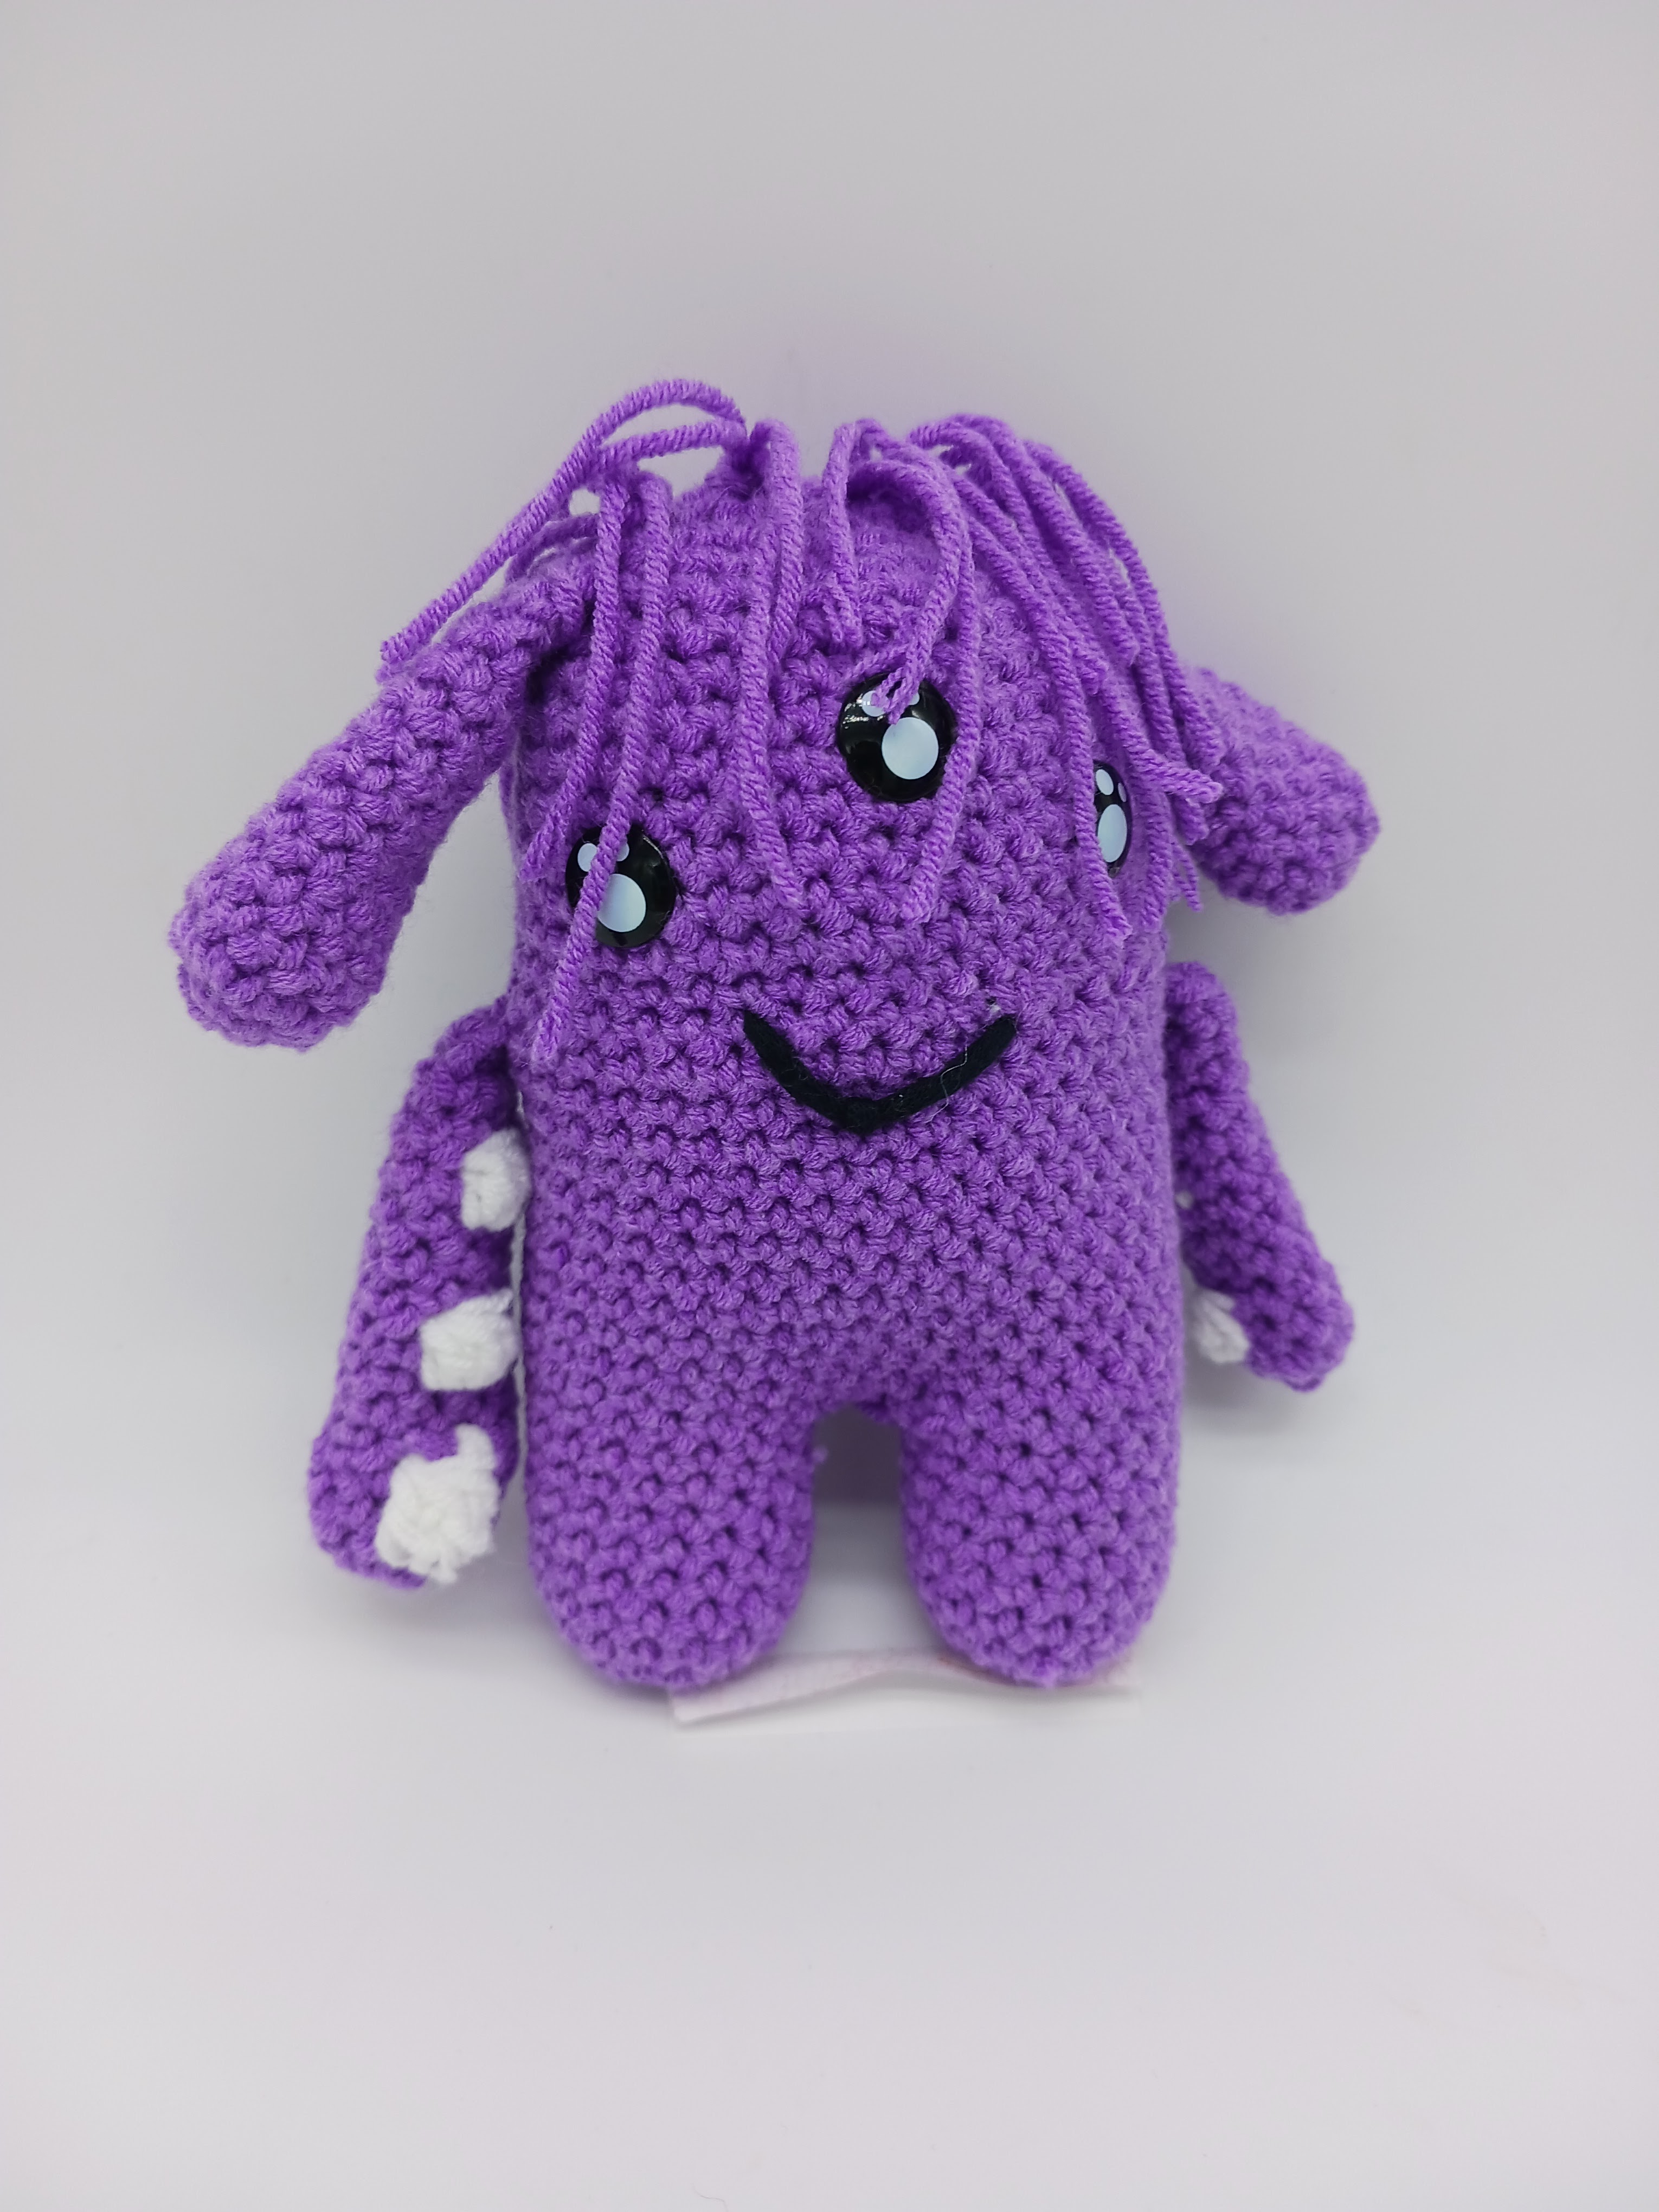
As you can see, he can be made two ways: with white circles behind the eyes, and a crocheted mouth, or just use plain safety eyes and embroider a mouth for less sewing. 

May Monster

I used worsted weight yarn and an F hook (3.75 mm). Each monster takes 1.6 oz worsted weight in main color and less than half an ounce of your accent color and white for the tentacle bobbles.

Make arms and ears before the body, so you can crochet them on. I also like to crochet the eyes and mouth before making the body (if you’re doing that version), so I can sew those on while I can work from both sides.

Arms: Make 2 in main color with white bobbles. Note: arms are not stuffed.

R1: sc 6 in MR (6)

R2: (sc, inc) x 3 (9)

R3: sc (9)

R4: sc, change to white, 4dc bobble, change to main color, sc 7 (9)

When you sc over your bobble stitch in round 5, use the BLO of the bobble. This gives a cleaner look to your bobble.

R5-7: sc (9)

R8: repeat row 4

R9-11: sc (9)

R12: repeat row 4

R13: sc (9)

R14: (sc, dec) x 3 (6)


Fold in half (if needed, do another sc or two so that your bobbles are centered) and sc closed. FO and weave in end.

Ears: Make 2 in main color. Ears are not stuffed.

R1: 6 sc in MR (6)

R2: inc x 6 (12)

R3-10: sc (12)

R11: (sc 2, dec) x 3 (9)

R12: (sc, dec) x 3 (6)

Fold and sc closed. Weave in end.


Eyes: Make 3 in white

Round 1: 8 sc in MR. FO, leaving tail to sew to body. Don’t tighten MR completely, as you will be putting a safety eye through the center. I used 10 mm safety eyes.


Mouth: Make 1 in white

Ch 8.

Starting in second chain from hook, sl st, sc, hdc, dc, hdc, sc, sl st.  FO, leaving tail to sew to body. Using embroidery floss or sport weight yarn, embroider 3 vertical slashes. Sew centered under the eyes with the top of the mouth (the chain) at row 13.

Legs:  Make 2 in main color. You will finish off leg one, but after leg two, you continue on with the body.

R1: 6 sc in MR (6)

R2: inc x 6 (12)

R3: (sc, inc) x 6 (18)

R4-8: sc (18)

Body:

Chain 3 and join leg 1 with a sc. Continue to sc around leg 1 and make 3 sc in the connecting chain. Sc around leg 2 and make 3 sc in the back side of the chain. (42)

R2-12: sc (42)

R13: sc, attaching arms at sides

To determine arm placement, fold body in half and mark side stitches. When you get to the stitch before the marker, hold arm in front of your work and sc through both the arm and the body for the next three stitches. Repeat for other arm.

R14-21: sc (42) Stuff legs, stuff body as you go.

Two of the eyes will be sewn with the center over row 16/17. The third eye will be centered between the other two eyes, over rows 19-20. The mouth is centered between the lower eyes

R22: (sc 5, dec) x 6 (36)

R23: (sc 4, dec) x 6 (30)

R24: sc , attaching ears to sides. (30)                        

R25 (sc 3, dec) x 6. (24)                                                      

R26: (sc 2, dec) x 6. (18) Finish stuffing

R27: (sc, dec) x 6. (12)

R28: dec x 6 (6) FO

Cut 10 7” strands of hair. Latch, two at a time, evenly spaced across the top of the head.

For my purple monster, I used Kawaii safety eyes rather than making the white backgrounds, and embroidered a simple smile, making it a no-sew version.

From my tester Bonnie


Friday, May 10, 2024

April Monster of the Month

April Monster of the Month


This month’s monster is a cheerful little guy, with a few different design features. I mix up rows and rounds in the head/body to give it more of a boxy shape. The foot/leg section has a built-in ankle.


Made with worsted weight yarn and an F hook, he measures about 9” tall.


I used 2.1 ounces of the main color, less than half an ounce of the accent color, and less than a yard of white and black for eye accent and smile.


I used 15 mm safety eyes


Start at the top with main color. First section is worked in rows. Note: the body is done in HDC, while arms, legs and horns are made in SC

Row 1: Ch 13. Starting in 2nd ch from hook, hdc 12.

Rows 2-4: Ch 1, turn, hdc 12. 

Row 5: Do not turn. Add an additional hdc in the same stitch just worked. Turn your work and work 4 hdc down the side, with an additional hdc in the corner. Turn work and make 12 hdc across, with an additional hdc in the corner stitch. Turn and work 4 hdc up the side. Place one more hdc in the corner. (36: 12 on each long side, 4 on each short side, and one additional hdc in each corner)


Now we work in continuous rounds. Use a stitch marker to mark your beginning point to help keep track of rows.

Round 1: BLO hdc (36)

Rounds 2-8: hdc (36)


Now we go back to working back and forth. If needed, hdc over to the beginning of a long row. 

Row 1: BLO hdc 12

Rows 2-4: ch 1, turn, hdc 12. FO, leaving long tail for sewing closed.


Fingers (make 8 in accent color)

Ch 4. Starting in 2nd chain from hook, sl st 3. FO, leaving a 2” tail for attaching.


Arm (Make 2 in main color)

Round 1: Ch 5. Starting in 2nd chain from hook, sc 3, 3 sc in last chain, turn work and sc 2, inc in the back side of the chain. (10)

Rounds 2-7: sc (10) (See note below about attaching fingers.)

Finish off after row 7, leaving a tail to sew arms to body.


After row 2, attach fingers. Your starting chain will have four small holes.  Pull your starting tail for the first finger through 1st hole and your finishing tail through the 2nd hole. Triple knot your yarn ends. Trim close to the knot. 


Continue with three more fingers. Finger #2 will go in holes 2 & 3, Finger 3 in hole 3 & 4, Finger 4 in hole 4 and the adjacent sc in round 1.


Possible variations: you can make your fingers longer with a longer starting chain. Since the arms are not stuffed, you could go up with your hook size to make the arms more flexible. 


Foot (make 2 in main color)

Round 1: sc 6 in mr

Round 2: inc x 6 (12)

Round 3: *sc, inc* x 6 (18)

Rounds 4-5: sc (18)                                                                                

Round 6: *sc 4, dec* x 3 (15)

Round 7: *sc 3, dec* x 3 (12)

Stuff lightly and fold the top together. Sc 5 across the top. 

Ankle transition: 

Ch 1, turn, hdc 5 (5)

Ch 1, turn, FLO sc 5, turn your work and BLO sc 5 on the other side. (10) Now we will go back to working in the round again. 

Round 1: sc (10)

Round 2: (sc, inc) x 5 (15)

Rounds 3-6: sc (15) FO, leaving a tail to sew to body. You can stuff the legs or leave them unstuffed to make him more of a sitting monster.


Horns (make 2 in accent color)

Round 1: 4 sc in MR (4)

Round 2: inc, sc 3 (5)

Round 3: inc, sc 4 (6)

Round 4: inc, sc 5 (7)

Round 5: inc, sc 6 (8)

Round 6: inc, sc 7 (9)

Round 7: inc, sc 8 (10)                                                                    

FO, leaving tail to sew to head. 


Eyebrows: (make 2 in accent color)

Ch 7. Starting in 2nd chain from hook, sl st, sc, hdc, dc 3. FO, leaving tail to sew to head. 


 Place safety eyes between rounds 4 & 5, with 6 stitches between. Before securing safety eyes, place the eyebrows above the eyes to make sure you have enough room. Use a little white yarn to make an accent on the outer side of each eye. Sew eyebrows over eyes, with the thickest part at the center of the face. Embroider a mouth over round 6. Stuff head/body and sew the bottom flap closed.

Sew the horns on the top of the head. I placed mine close to the outer edges.


Sew legs to the bottom of the head/body. I positioned my legs so that  the edges lined up with the edges of the bottom of the head/body.


Sew arms to the side of the body, even with the bottom of the eyes.

Possible variations: add some hair between the horns: a mohawk, a few strands of yarn, or dreads. To make dreads, I take about a yard of yarn and pull a loop through a stitch where I want the dread. Then, using a K hook, I crochet a chain using both strands of the yarn. When I run out of yarn, I finish off the chain, pulling the yarn nice and tight, and trim the ends to make them even.


Thank you to Bonnie for testing my pattern for me! Here is her adorable monster!