Donuts have always been a hit at my craft shows... so when "Postive Pals" (little crochet animals and such holding an encouraging sign) became popular, I worked on making a Positive Donut. I've sold a few at craft shows, so I wrote up the pattern and now I'm sharing it with my crafty friends.
It takes less than half an ounce of worsted weight yarn, a bit over .2 ounces of a light brown for the donut, and about the same in a frosting color. You want to make sure the yarns are very close in weight, so that the halves of the donut match up. If you use a thinner weight for one side, and thicker worsted for the other, it will be hard to line up the stitches to crochet them together.
I used .25 ounces of light tan and .25 ounces of a medium brown with a 3.75 oz hook.
I also used 6 different colors of scrap yarn (4" - 8" lengths) for the sprinkles.
You'll need a stitch marker for keeping track of your rows, a yarn needle for weaving in your ends, and some polyfill. I used 9 mm safety eyes and a short scrap of black yarn to embroider the mouth.
Start with your donut color. Chain 15 and join with a slip stitch. Ch 1
I do not work over my yarn tail. I leave it exposed to help with attaching the frosting yarn later.
Round 1: Sc in each chain. (15) Do not join - we will work in continuous rounds.
Round 2: (sc 2, inc) x 5. (20)
Round 3: (sc 3, inc) x 5. (25)
Round 4: (sc 4, inc) x 5. (30)
Round 5: sc (30)
Round 6: Make arm, sc 15, make arm, sc 15. (30 + arms)
(Arm: Ch 8. Make a 3 dc bobble in the 2nd chain from hook. Sc in remaining chains. Slip st in the side of the last sc before the arm)
 Arm 1
Arm 1FO at the end of Round 6.
Now it's time for the frosting side. Attach your frosting color yarn to the wrong side of the donut. Bring your working yarn up through the hole in the donut. For the first row or two, you will be pulling your yarn through the hole of the donut. Don't worry, you don't have to do that for the whole frosting!
Round 1: Sc in the backside of each chain from the donut starting chain. Count to make sure you have 15 stitches (it's easy to miss one... if needed, you can do in increase to get up to 15). The right side of your frosting should be facing the right side of your donut.
 Starting frosting
Rounds 2 - 5 of the frosting are the same as the donut. After round 2 or 3, pull up a long loop (so your stitches don't unravel), take the hook out, and push your frosting through the hole of the donut. Now the wrong sides of the donut and the frosting are facing each other, the way they should be. Continue until you're done with round 5. We won't need to add arms on the frosting side.
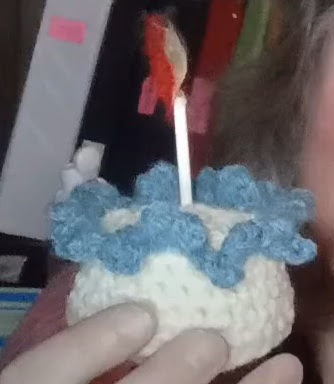
 Two rows of frosting done
 Frosting pushed through
Round 6: sc (30)
 At the end of round 6
Now is the time to add sprinkles... using short scraps of colored yarn, make random little stitches around the frosting. Once I was close to the end of one scrap, I would tie the next color to it (on the wrong side of my work) and continue on with the new color. Figure out where the center top of your frosting is, in relation to the placement of the arms, and put safety eyes 3 rows down, with 4 stitches between. Embroider a small mouth 1 row below the eyes, centered between them.
Once your sprinkles and face are done, we'll crochet the donut edges together. You can just sc them together, but I prefer a bit of a frilled edge. I get them by doing a sc, then I chain 1, spin the donut around once to twist the chain, and then I go on to the next sc. It makes an edge that looks a little like a crab stitch, but it's a lot easier!
Round 7: Hold both sides of the donut together and work 30 sc (or sc, twisted chain) around, working through both the frosting and donut layers. When you get the arm, push it toward the front of the donut and work around the back of it. After every 10 stitches or so, stuff the section you just finished. Before you finish the final stitches, give the donut a pinch all the way around to make sure you don't have any gaps where you missed stuffing. If you find a gap, you can usually push stuffing into it and re-stuff the area you just pushed stuffing out of. You want your donut to be pleasantly plump!
Here are the pictures for the little card that he holds. You can paste them into a document, change the size to suit your donut, and print them out. I "laminate" mine with packing tape or self-adhesive laminating sheets and use hot glue to attach to the donut. First I put two little stripes of glue on the back of the sign and press it onto the donut. Then I put a touch of glue onto the bobble at the end of the arm, and press the bobble onto the edge of the sign.