I try to use even the smallest scraps of yarn. When I finish a project, and have yarn left over, I usually wind it into a cake and it goes into one of my scrap yarn collections... if it's a few ounces of yarn, it goes into a large tray with similar size cakes of yarn. Smaller cakes (one ounce or so) go into the scrap yarn box next to my chair, for when the need to make a cute little project hits me.
If it's a really small amount of yarn, like only a yard or two, it goes into a gallon-size Ziploc bag next to my chair. That bag also gets the yarn ends that I cut off after sewing a project (if it's more than 6" or so). Well, the bag was overflowing, so I decided I needed to do something!
During Wheel of Fortune, I made two scrap balls. I just kept pulling yarn from the bag, knotting it to the end of the last strand, and rolling it up. It's a rather mindless project that takes a while, but making Mr. Ugly goes a lot faster if your yarn is prepped!
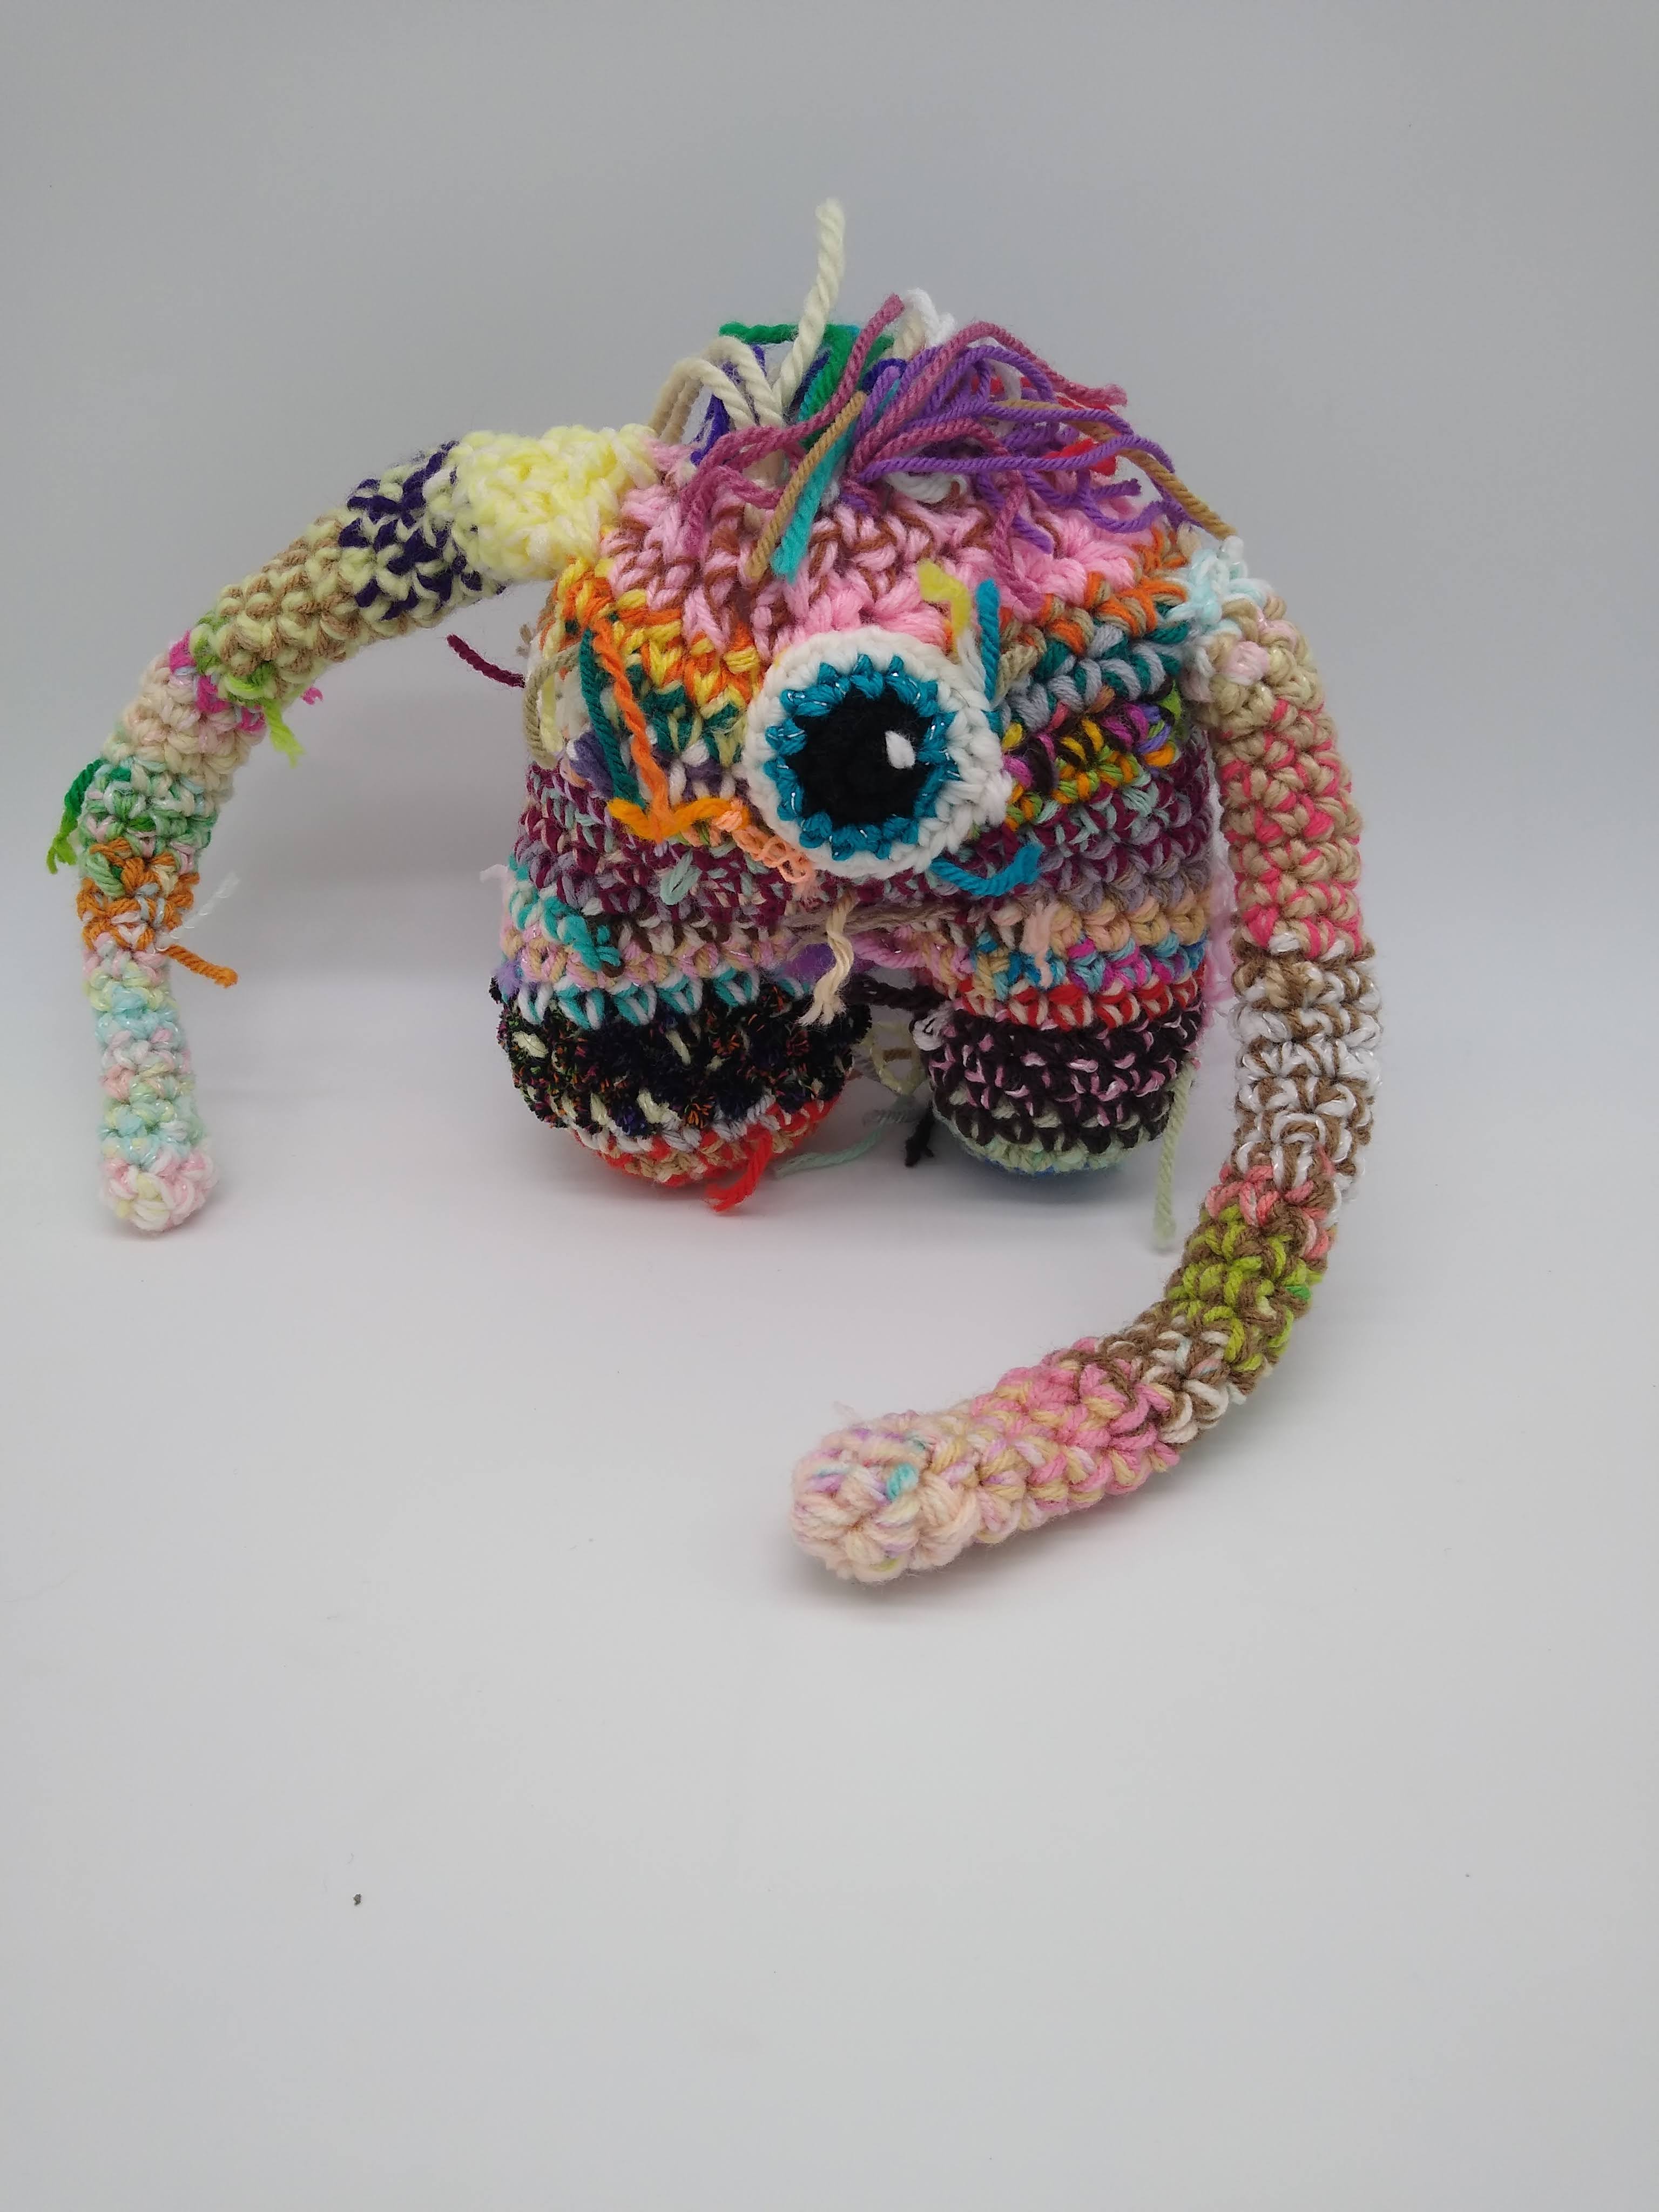
I kept going until each ball was about 5" across. It used up about half the bag! I even found an eye in the bag... so I decided to make a one-eyed monster. (When I needed to add to the scrap balls to finish the arms, I found a second eye. I guess I'll be making a Mrs. Ugly too!)
Then I got to work on Mr. Ugly.
I started at the bottom, with his legs. I held the yarn double and used a K crochet hook. Don't worry if the yarn ends are showing as you work! That's part of what makes him Mr. Ugly!
Round 1: 6 sc in Magic Ring (6)
Round 2: inc x 6 (12)
Round 3: (sc, inc) x 6 (18)
Rounds 4-9: sc (18)
Finish off leg one, and make another leg in the same manner, but don't finish off.
Round 10: Joining legs. Holding legs together, sc around leg 1, then around leg 2. (36)
Rounds 11-18: sc (36)
Round 19: (sc x 4, dec) x 6 (30)
Round 20: (sc x 3, dec) x 6 (24)
Round 21: (sc x 2, dec) x 6 (18)
Round 22: (sc, dec) x 6 (12)
Round 23: dec x 6 (6)
Finish off, leaving a tail. Weave tail through the 6 stitches of the last row and pull to close. Weave in end.
Arms: using double strand of scrappy yarn and K hook
Round 1: 6 sc in magic ring
Rounds 2-29: sc (6)
Finish off, leaving long tail to sew to body.
Eye: Using a single strand of worsted weight yarn and F hook.
Round 1: with black, sc x 6
Round 2: inc x 6 (12)
Round 3: with blue yarn, (sc, inc) x 6 (18)
Round 4: with white yarn (leave a long tail when you attach the white yarn, to make the accent on the black center) (sc x 2, inc) x 6 (24). Finish off, leaving a long tail to sew to Mr. Ugly's face.
Assembly: sew eye to center of body over rows 14-17. Sew arms to sides of body, even with the top of the eye. Using small pieces of scrap yarn, loop strands of yarn through stitches at the top center of his head, for a messy hairdo.
Notes: my finished Mr. Ugly is about 7" tall. You can make your Mr. Ugly taller by adding rows to the legs or body. You can make the arms shorter (I wanted him to have the ability to "hug" something.) You could give him a mouth, or ears or horns.
I had fingering, sport, worsted weight and bulky in my scrap balls. If I was adding fingering weight yarn, I used two strands. Fortunately, I never ended up with sport weight coming off both scrap balls.
I thought it was interesting that I only ended up with the same (or very similar) color coming off both balls at the same time twice. Mr. Ugly has a small purple stripe on his back, and a solid pink at the top of his head, just above the eye.

Since the original Mr Ugly sold on Etsy... I made another...
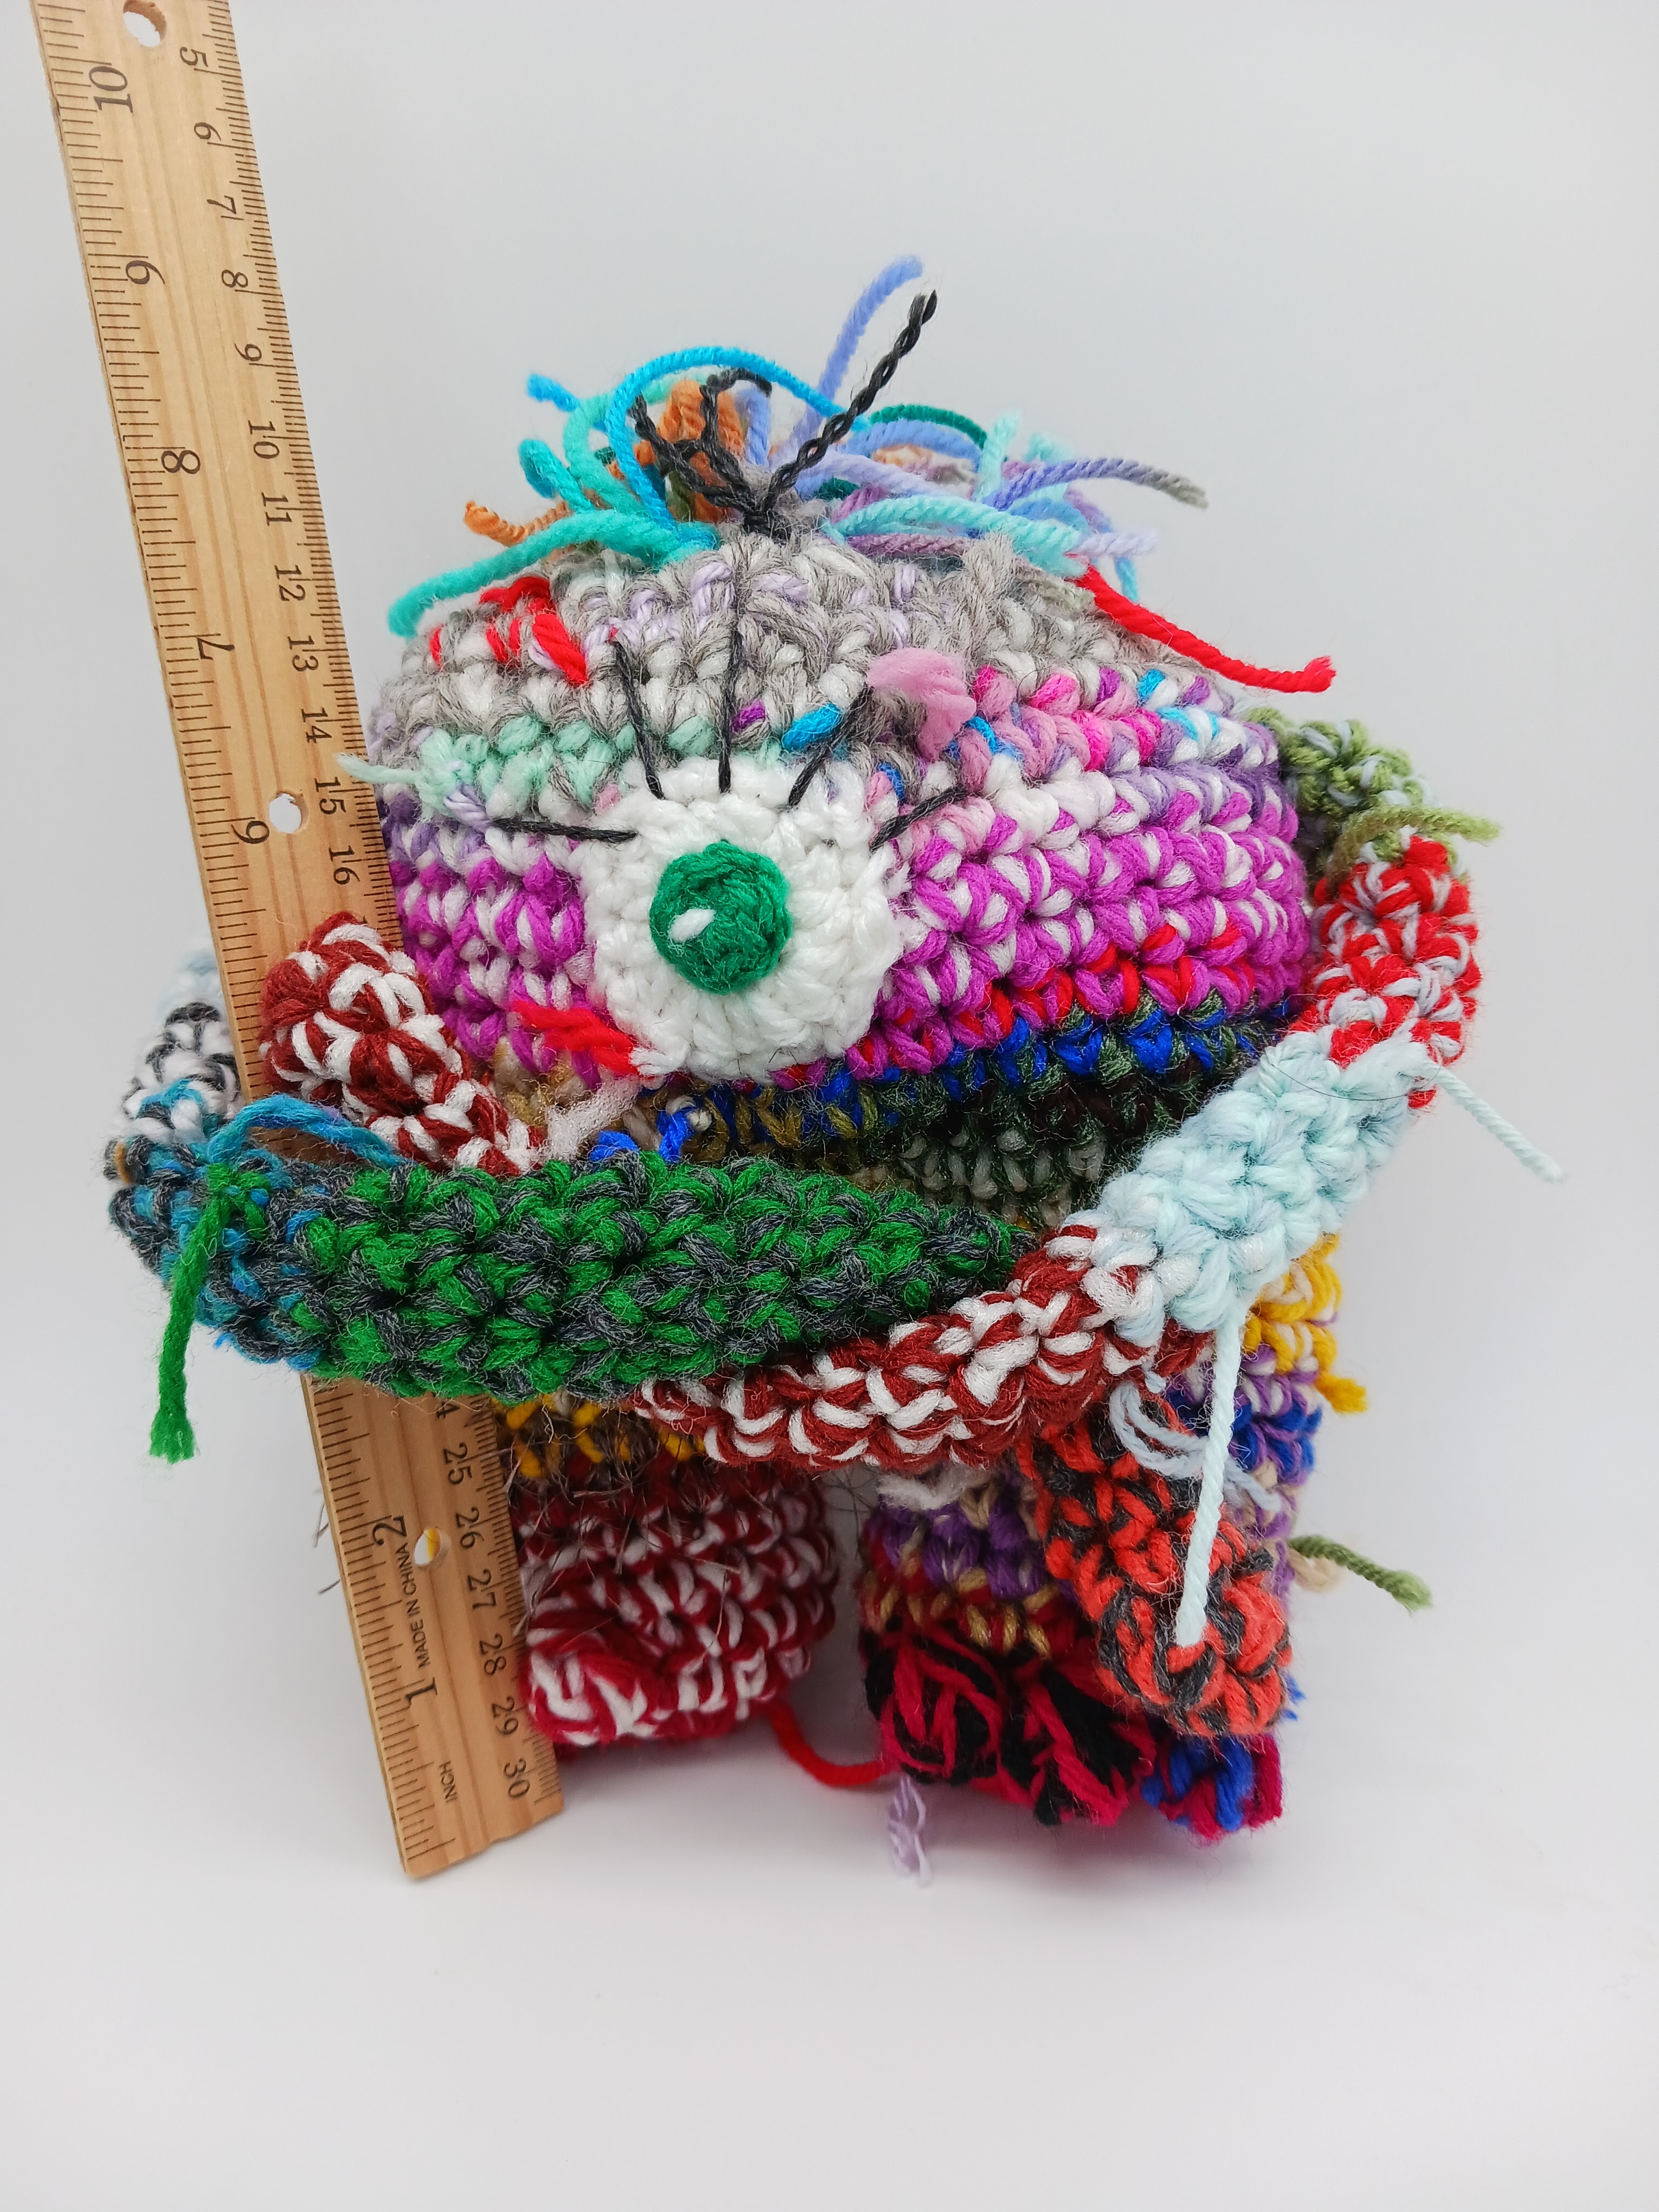
And then I was organizing cakes of scrap yarn and decided the scrap box needed a good cleaning, so Big & Sassy Mr. Ugly was born...
I used three stands of yarn together (2 worsted, one bulky) and a P hook. Since his face was so wide, I figured I had room for two eyes (the eyes are three rounds with two strands of worsted weight yarn and a K hook - 6, 12, then 18 sc stitches). Black parts of the eye are 5 sc in a magic ring. I had to make his arms shorter because I was running out of the bulky white/blue/green speckled yarn.
For the tongue, I used two strands of red and a K hook. In a magic ring, ch3, then make 7 dc. Pull right tight, but do not join. Ch 3, turn, and work four dc across the flat bottom. Work 2-3 more rows (ch 3, turn, four dc), or more, depending on how long you want his tongue to be.
I made another one... I gave him bobble toes, and tried to give him a chubby belly by doing some increases after I joined the legs. He just sold at my 4/1/23 craft show, so I'm gathering yarn for another one!
Here is the modification for adding three toes:
For Row 4, sc 3, *4-dc cluster, sc* x 3, sc 9
When it comes time to connect the legs, fold each leg in half so that the toes are centered on the front. Use a stitch marker to hold the legs together at the stitches that will be at the center of the body. On your second leg, sc over the marker, then sc around the first leg starting with the marked stitch. Then finish up your second leg.
I love how the hair on this guy turned out! I cut about a dozen strands of yarn about 4-1/2 feet long (my "wing span" - I measured it by stretching my arms out). I pulled up a loop at the top of the head, made sure the yarn ends were even, and chained until I ran out of yarn (usually about 20 chains), then pulled the yarn through and pulled tight to finish off.
I used up a lot of orange yarn on this guy.
For this one, I used up some bulky yarn and added horns.


No comments:
Post a Comment